Electronic and Programming Part

Electronic

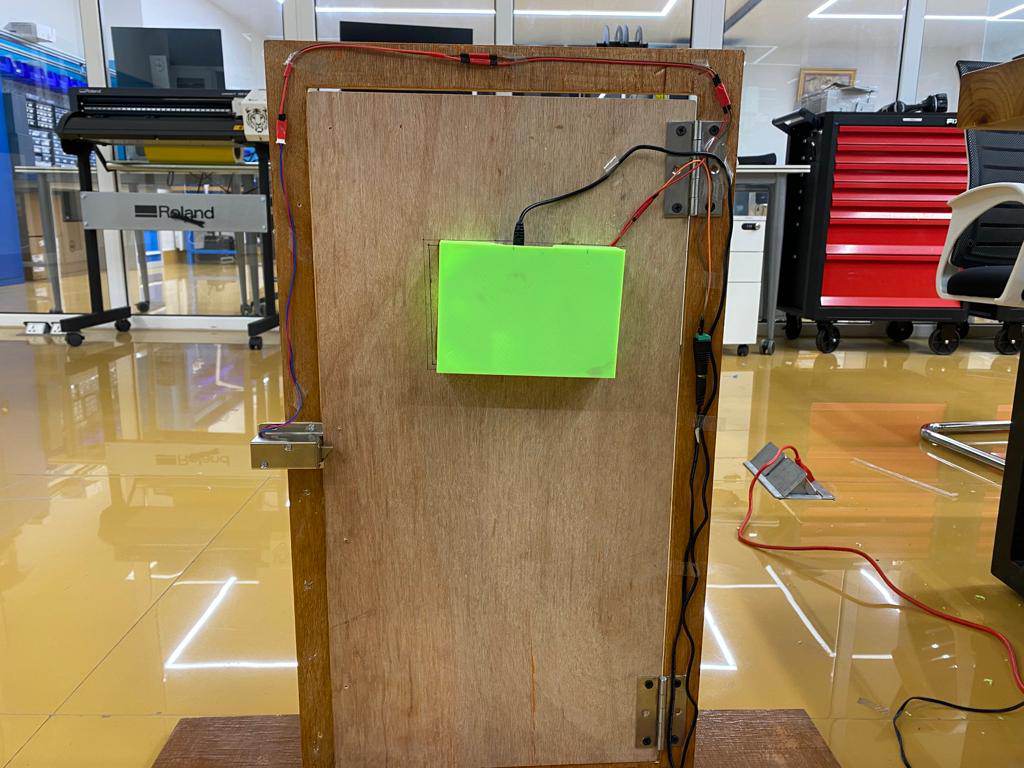
In this three to four days i worked with my PCB electronic board to redesign and make a workable for my final project. So i have done some research from online google and Mr. Ricko helped me on this to go through.

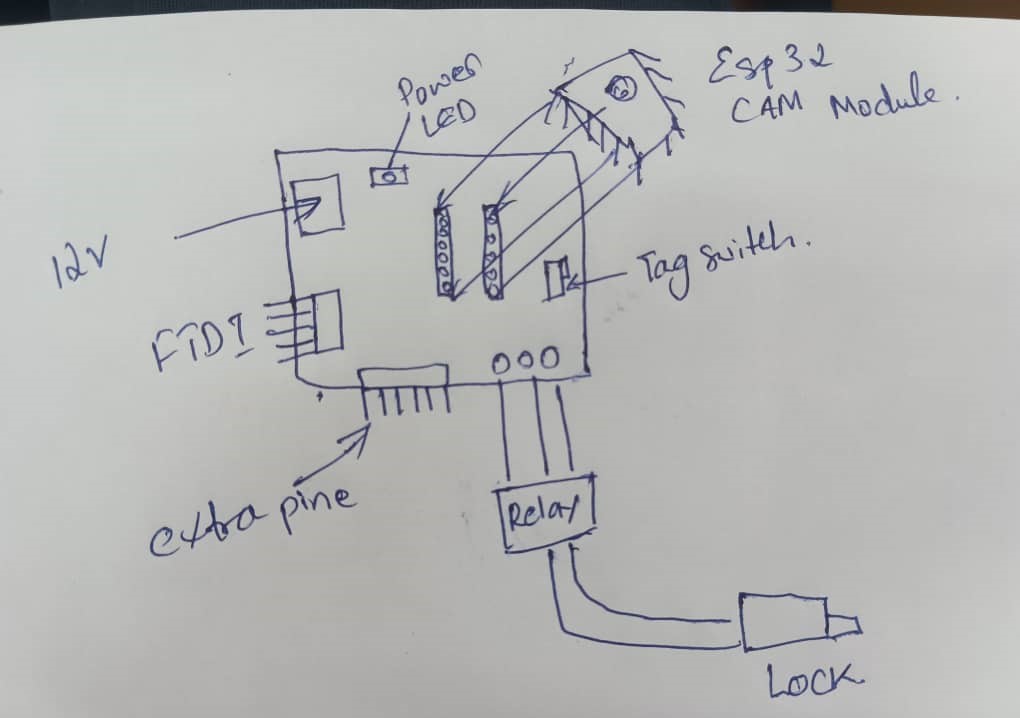
This is my rough sketch made by me and Mr.Ricko.

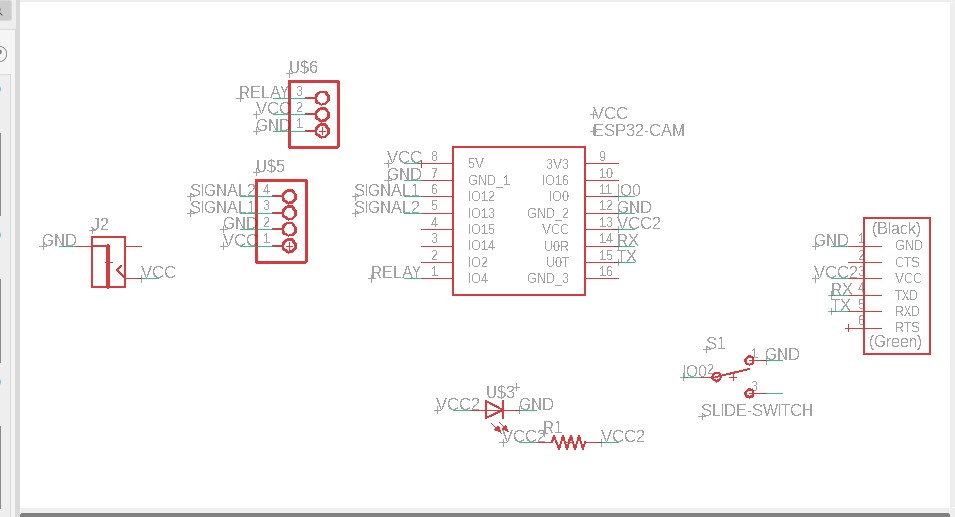
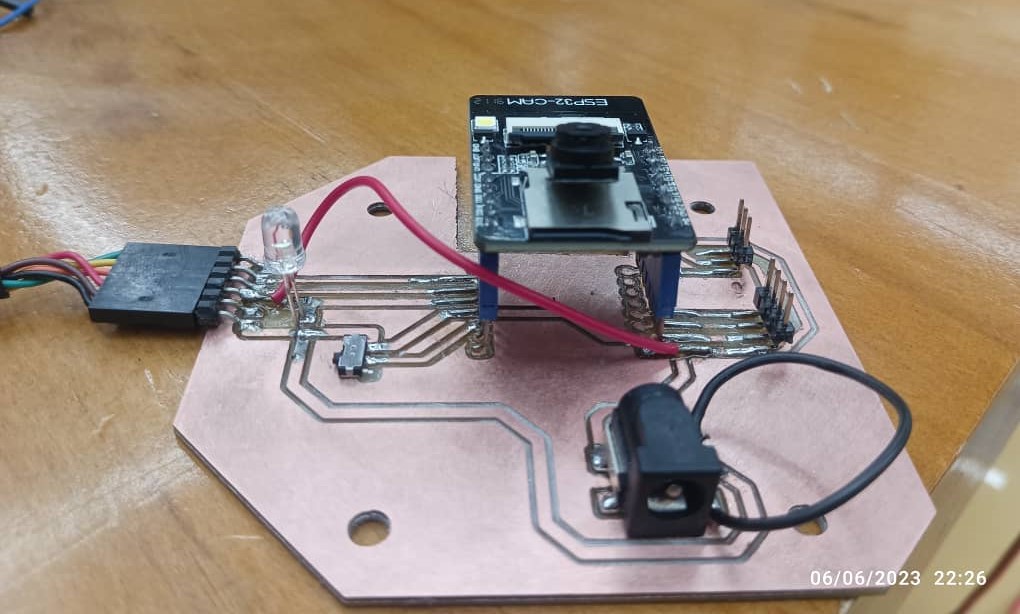
With this design i have implement in Eagle for my final board designing and i started to mill and done the soldering for my final board.
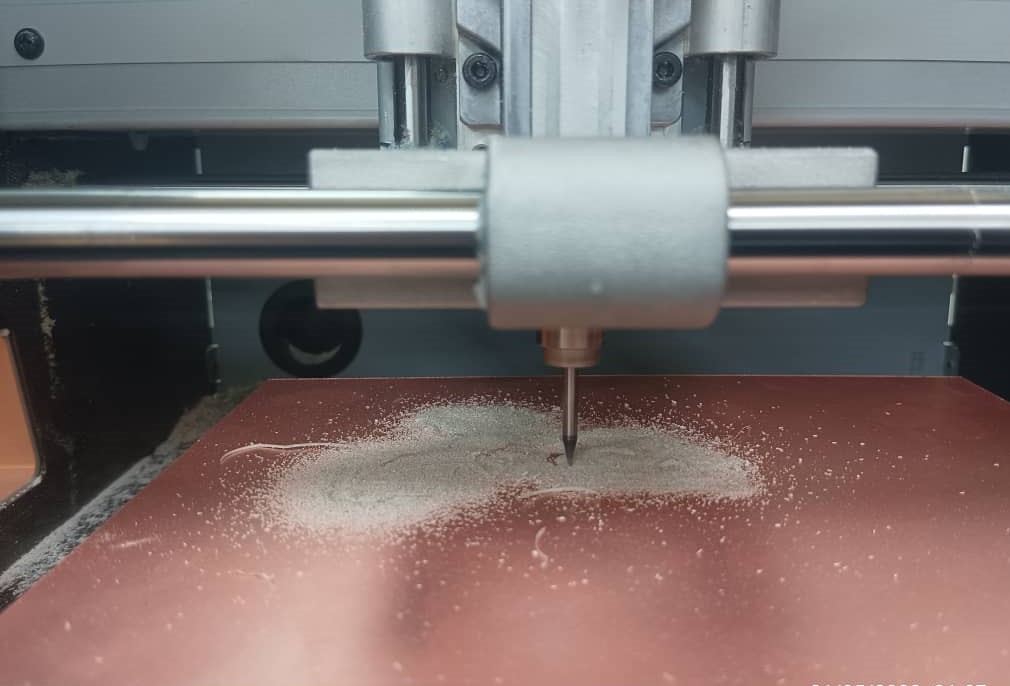
Milling

Done Soldering

Programming With ESP32-CAM

To do programming, Firstly i have tested my esp32cam board with web-server and LED blinking to check my board is working good. So I connected esp32-cam with the FTDI cable in my laptop.

Connection Pins

5v - 5v

GND - GND

UOR - TX

UOT - RX

GND - 100 (Connect in ESP32-cam for uploading code)

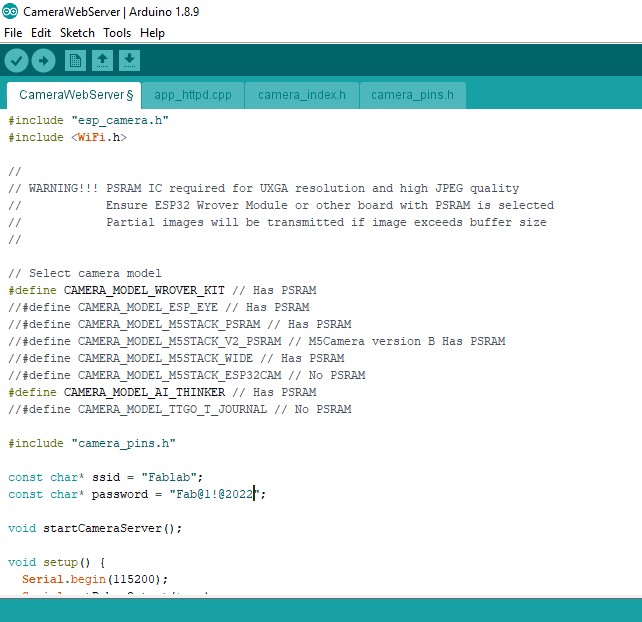
Code i have used from Example -- ESP32 -- Camera web-server Code Link

Setup for ESP32-CAM

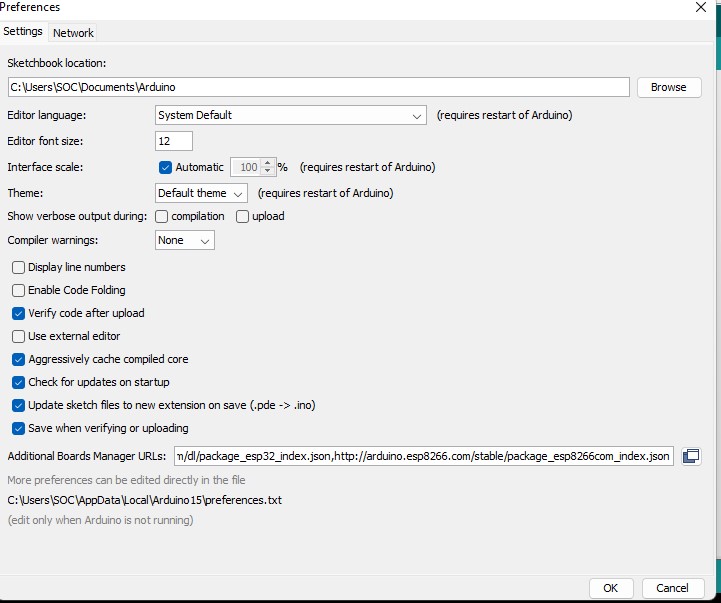
Before uploading the code to ESP32-CAM module,i have installed the ESP32-CAM board form board manager:

  • Update the Preferences –> Aditional boards Manager URLs:
  • https://dl.espressif.com/dl/package_esp32_index.json,

    http://arduino.esp8266.com/stable/package_esp8266com_index.json

    Board Settings

  • Board: “ESP32 Wrover Module”
  • Flash Mode: “QIO”
  • Partition Scheme: “Hue APP (3MB No OTA/1MB SPIFFS)”
  • Flash Frequency: “40MHz”
  • Upload Speed: “115200”
  • Core Debug Level: “None”
  • Programmer: “AVR ISP”
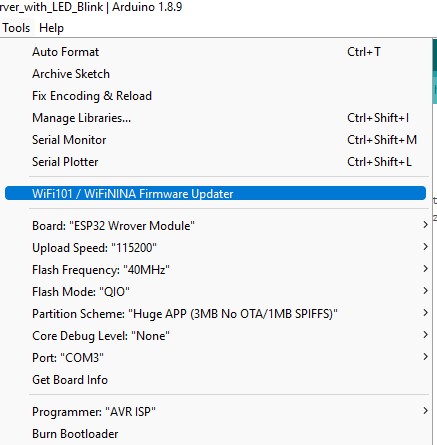
  • After settings are done, Upload your code. After uploading,press ESP32 CAM on-board RESET button to put the board in the flashing mode

    After uploading the code disconnect the GPIO-0 pin from GND pin.

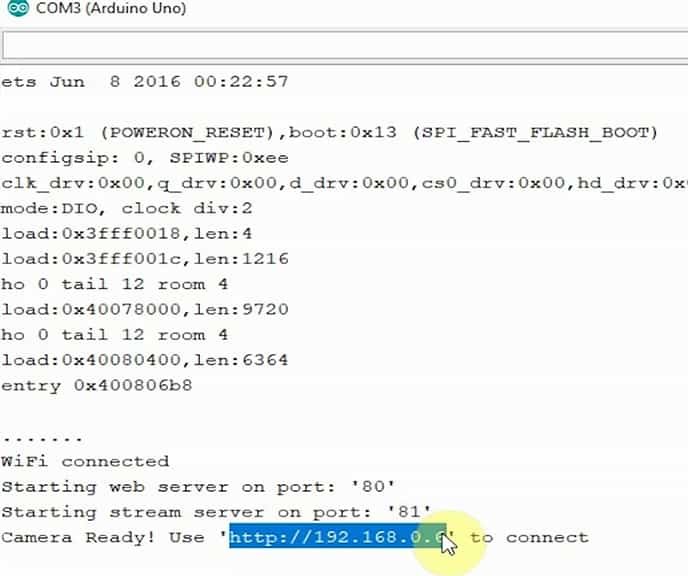
    Open Serial Monitor -- Set the Baud rate to 115200 -- Press the ESP32 CAM on-board RESET button

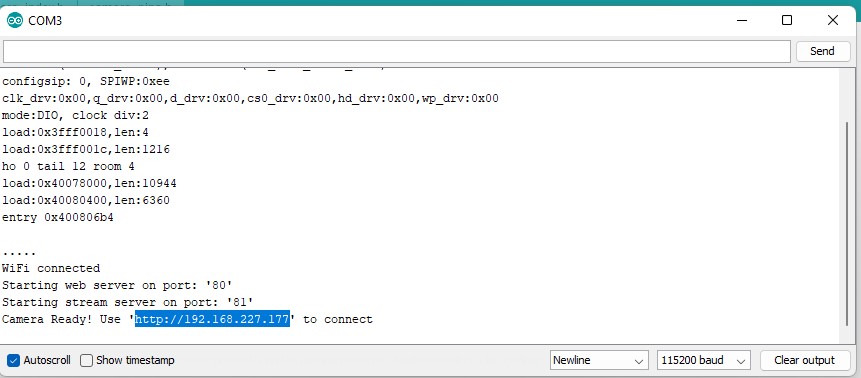
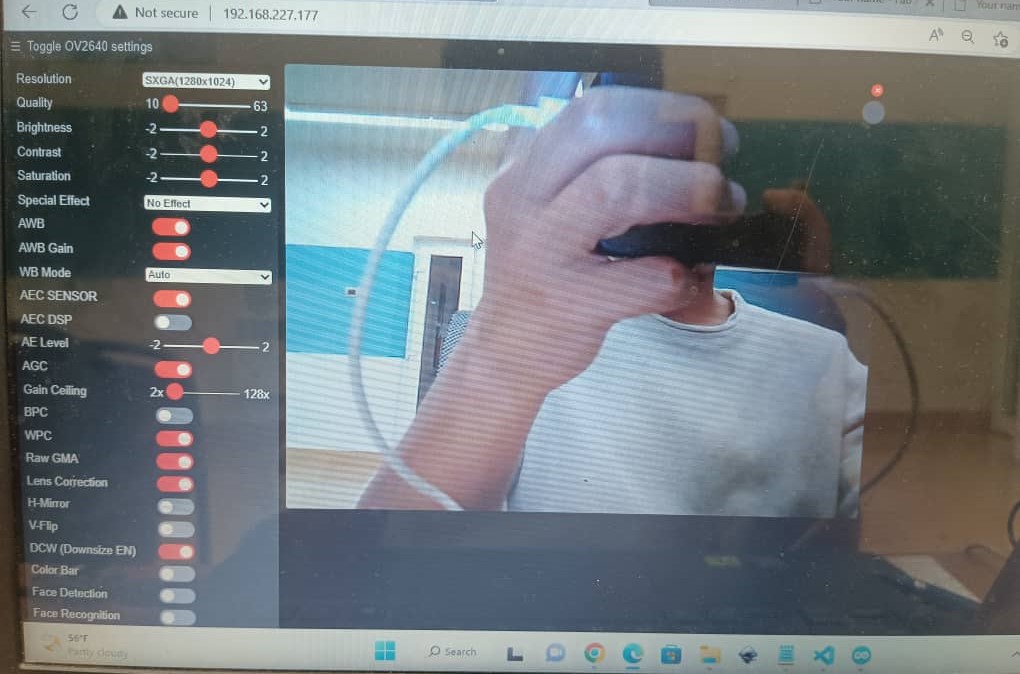
    Now you can copy the IP address and paste it to any browser to start the video streaming and capture Images.

    Programming With 12V Solenoid Lock

    In my final project, solenoid lock is an out put device and this was done on output week assignment. So here i have given the link to access my work flow.

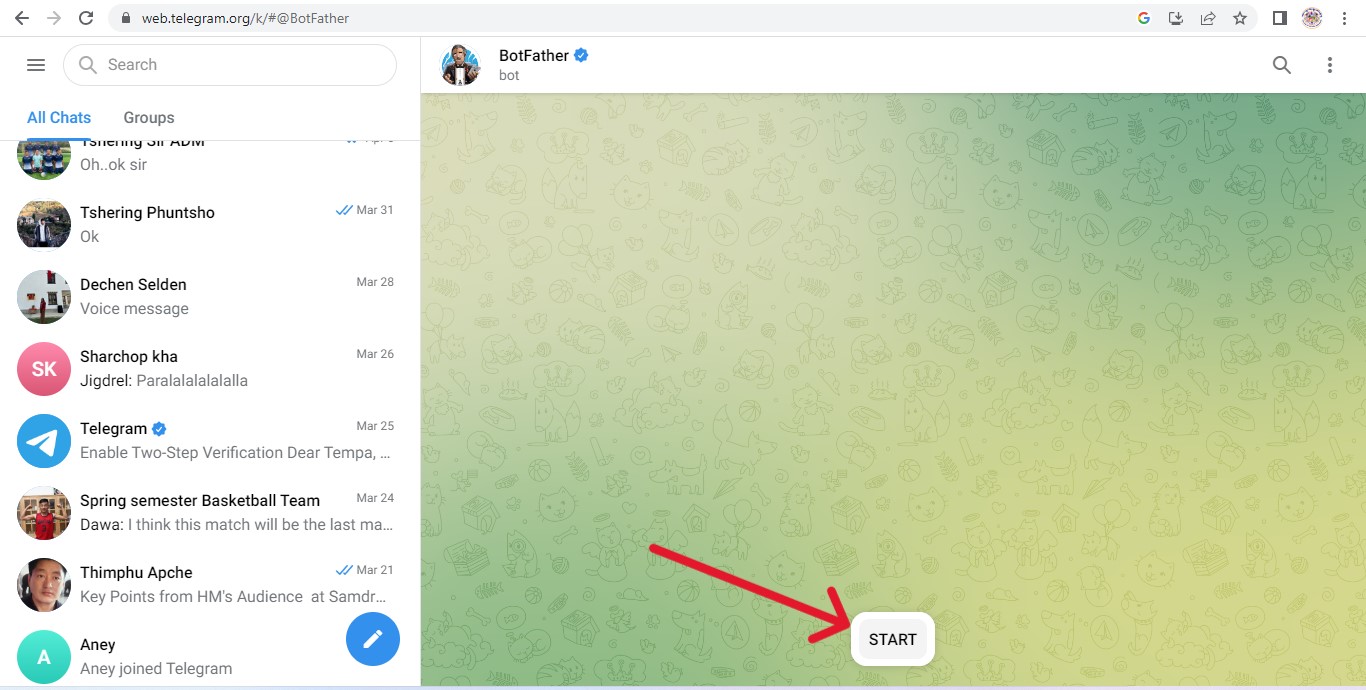
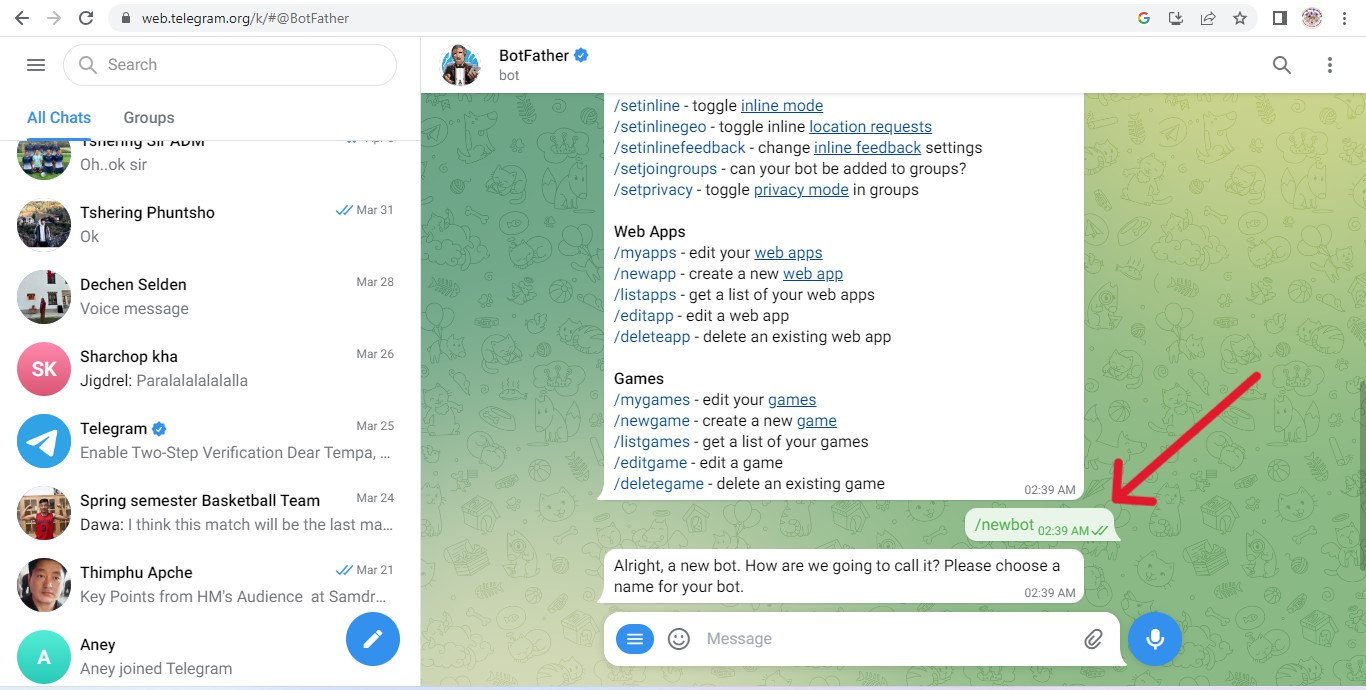
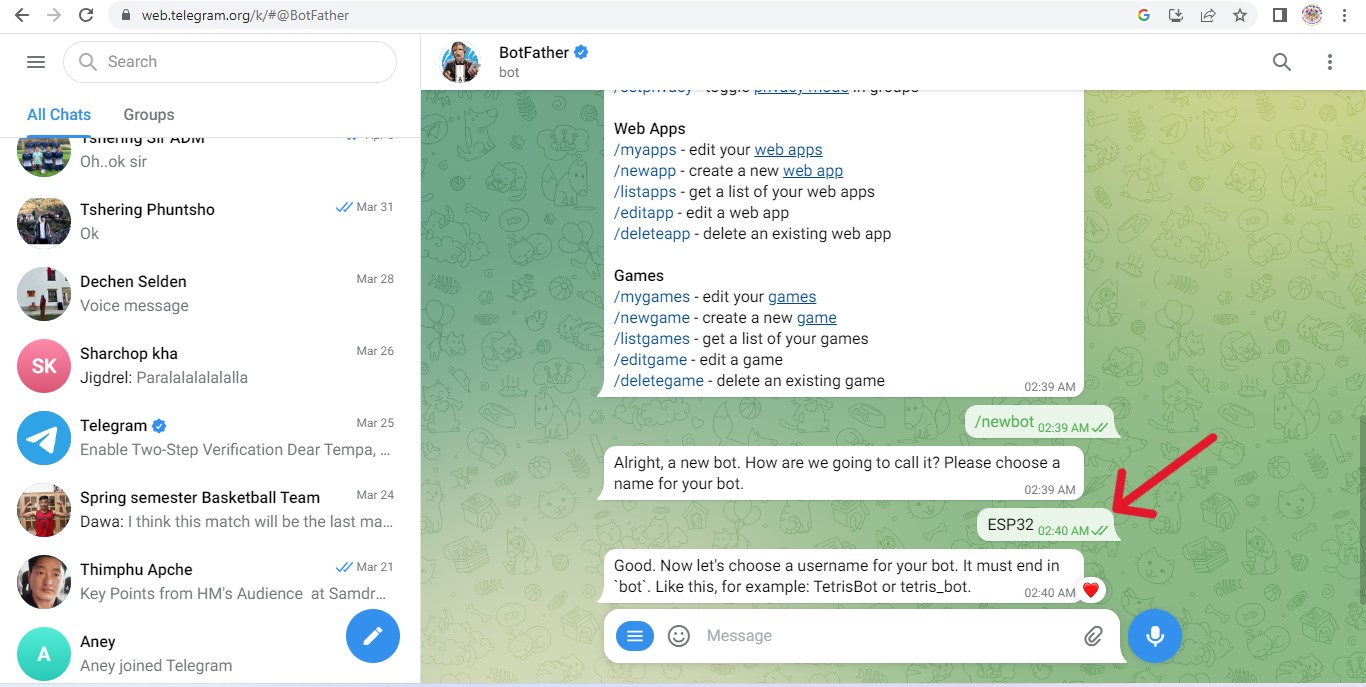
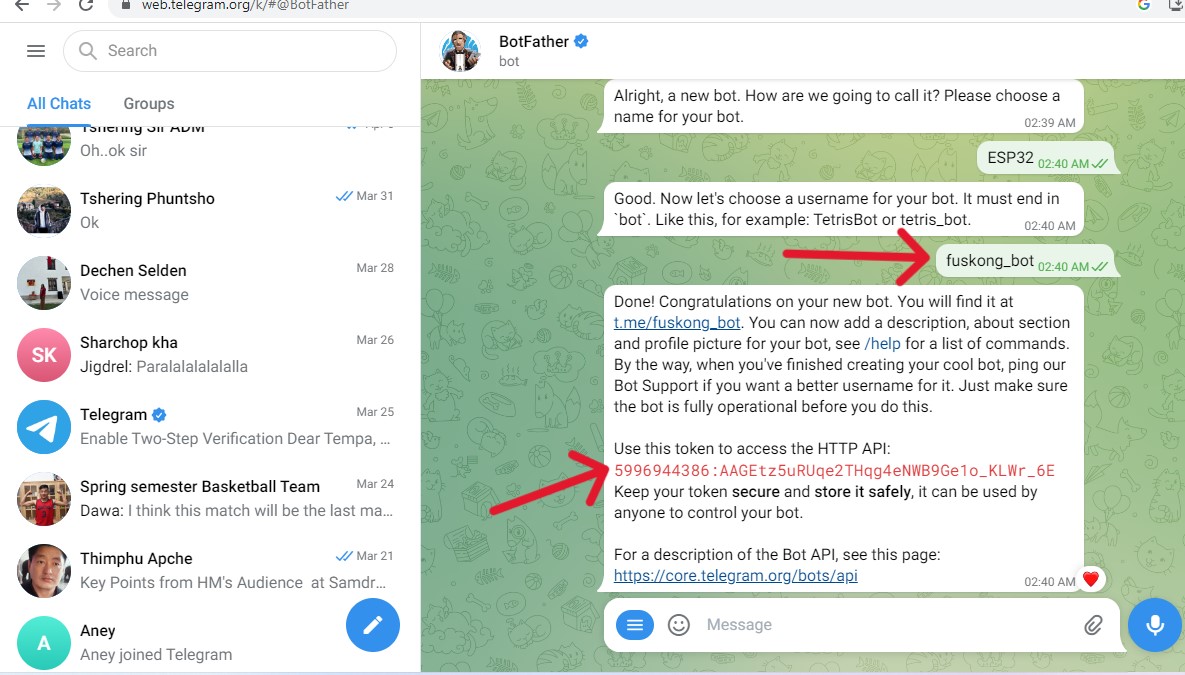
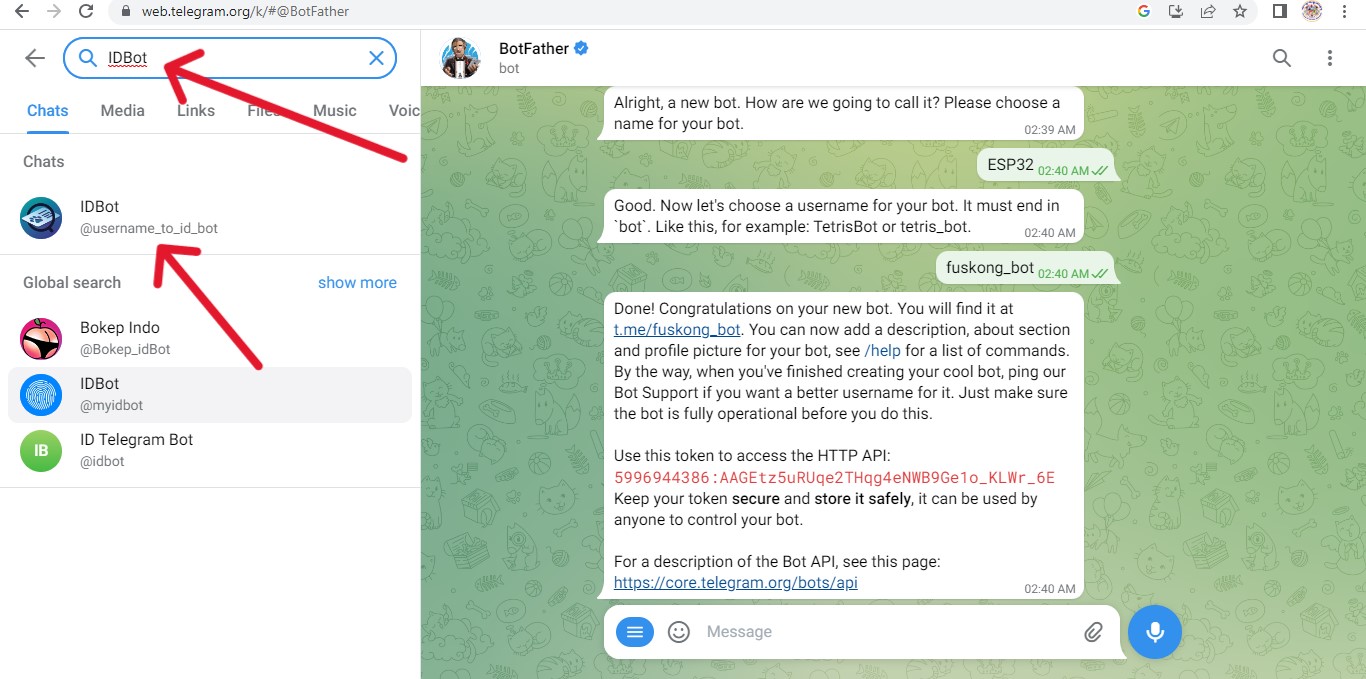
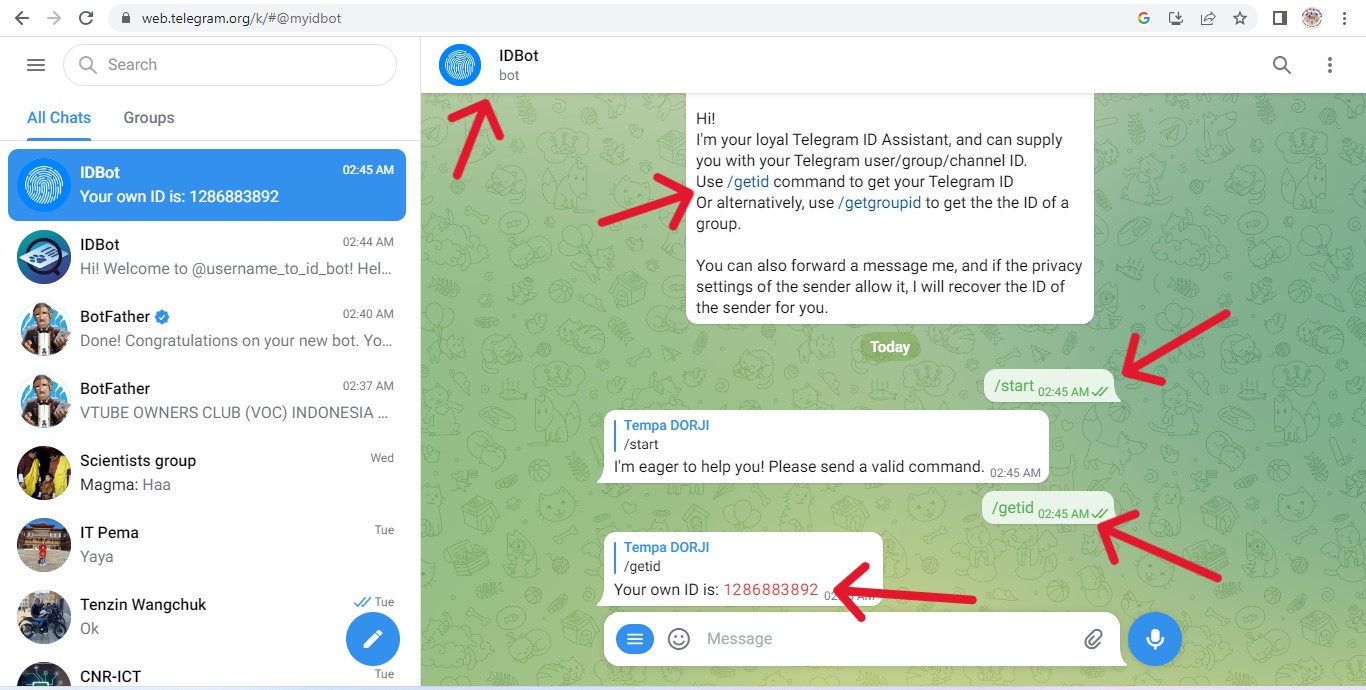
    Setup Telegram (Telegram Bot ID)

  • Firstly, Download and install the Telegram App from Google Play Store or App Store and then create an account.
  • Search for BotFather in Telegram.
  • Tap on start
  • Type "/newbot and press enter
  • Now give a name for the BOT. The name should be unique
  • Then enter a unique username. It should end with bot.
  • Now it will give you a bot token number marked with red color. so please not it down as it will required in the code.
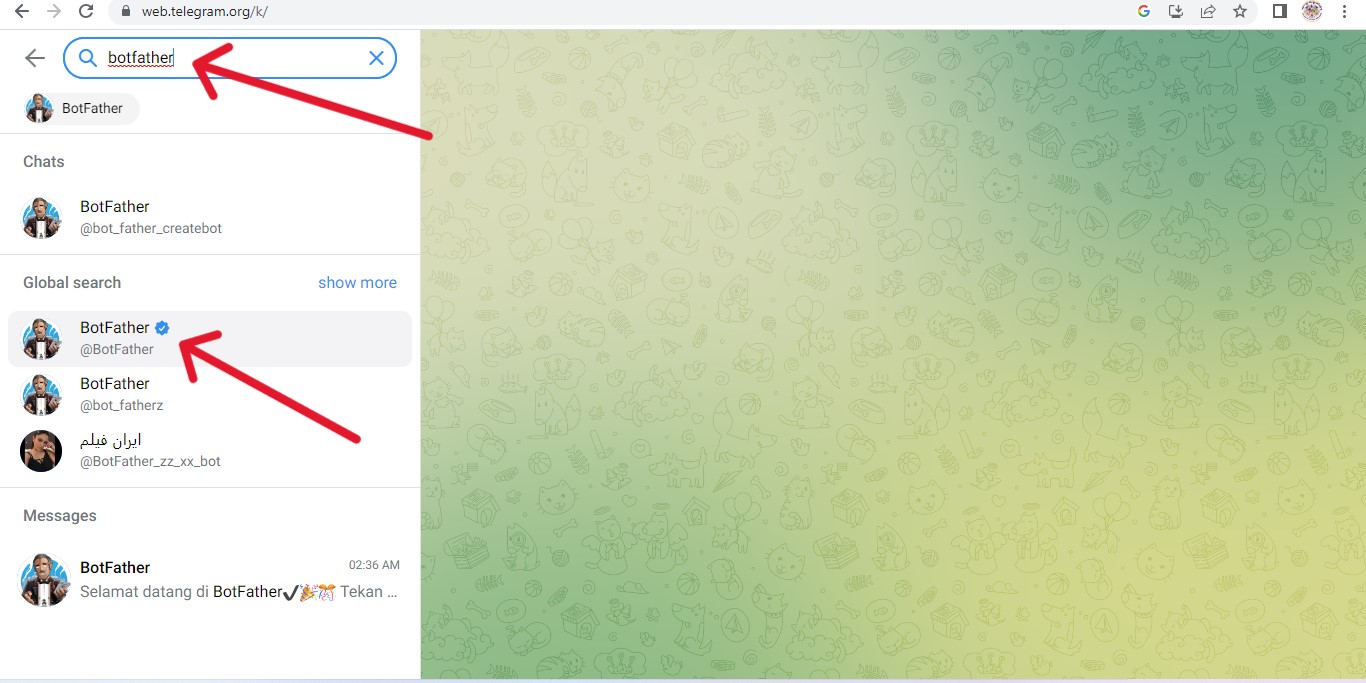
  • Get the User Id in the Telegram App

  • Search for IDBot in telegram
  • Tap on start
  • Tap on the /getid in IDBot
  • You will get the User ID.
  • Note the User ID. It will be required in the code.
  • Video

    Program with ESP32-CAM

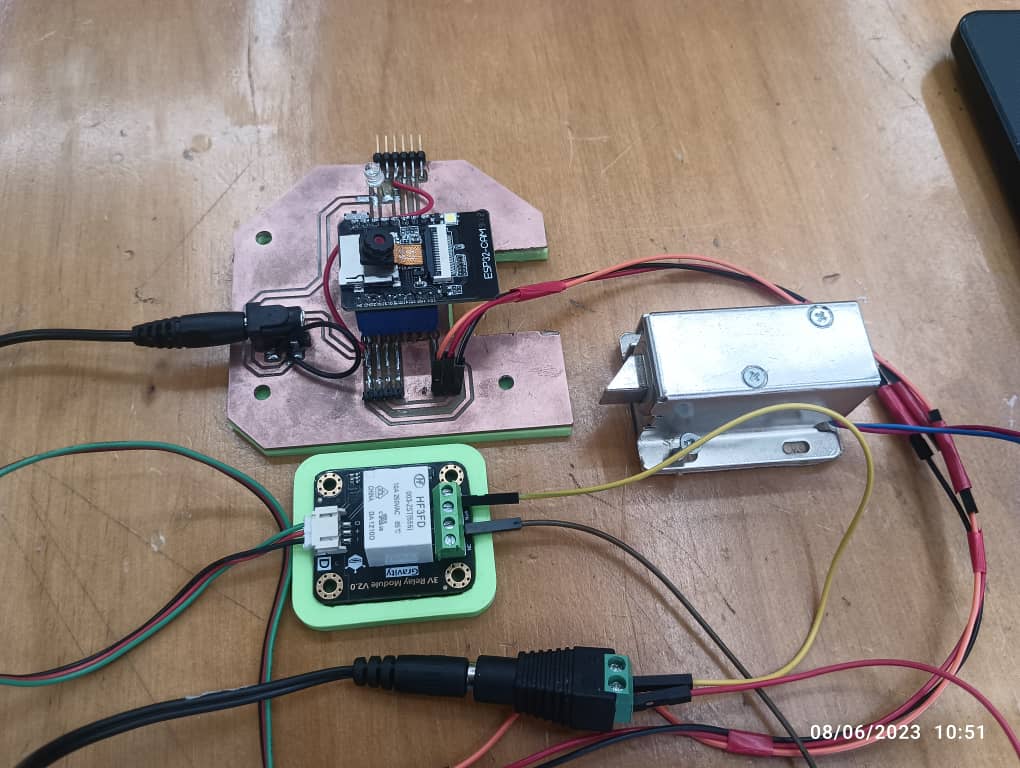
    In this, Now i am going to use my PCB board to connect all the input and output device to do programming on arduino IDE.

    For the programming I have used FTDI cable and for this project i have used the ArdunioJson and Universal Telegram Bot library.

  • During uploading the code the GPIO-0 and GND pin of ESP32-CAM should be connected.
  • To download library;

  • Download Universal Telegram Bot library Click Here
  • Download ArduinoJson library Click Here
  • Before uploading the code, you have to enter the following details.

  • Enter the WiFi name and password.
  • Enter the User Id and Bot token you have received from the IDBot and BotFather in Telegram App.
  • During uploading the code, if you see the “Connecting…..______” text, then press the RESET button. Then the code will start uploading.
  • After uploading the code, disconnect the GPIO-0 from GND pin.
  • Then open the serial monitor and set the Baud Rate at 115220.
  • Now, press the reset button of ESP32CAM. If the WiFi is connected successfully then it will print the local IP address.
  • Now, connect the ESP32CAM with the circuit. and give the 12V DC supply.
  • Then search for the Bot you have created and tap on START.
  • If the BOT is connected with ESP32CAM, you will get following message.
  • When we type /photo and send the message, the ESP32CAM will capture the photo and send it to telegram app.
  • After that tap on the /unlock to unlock the door then tap on /lock to lock the door again
  • Connection and Wireline
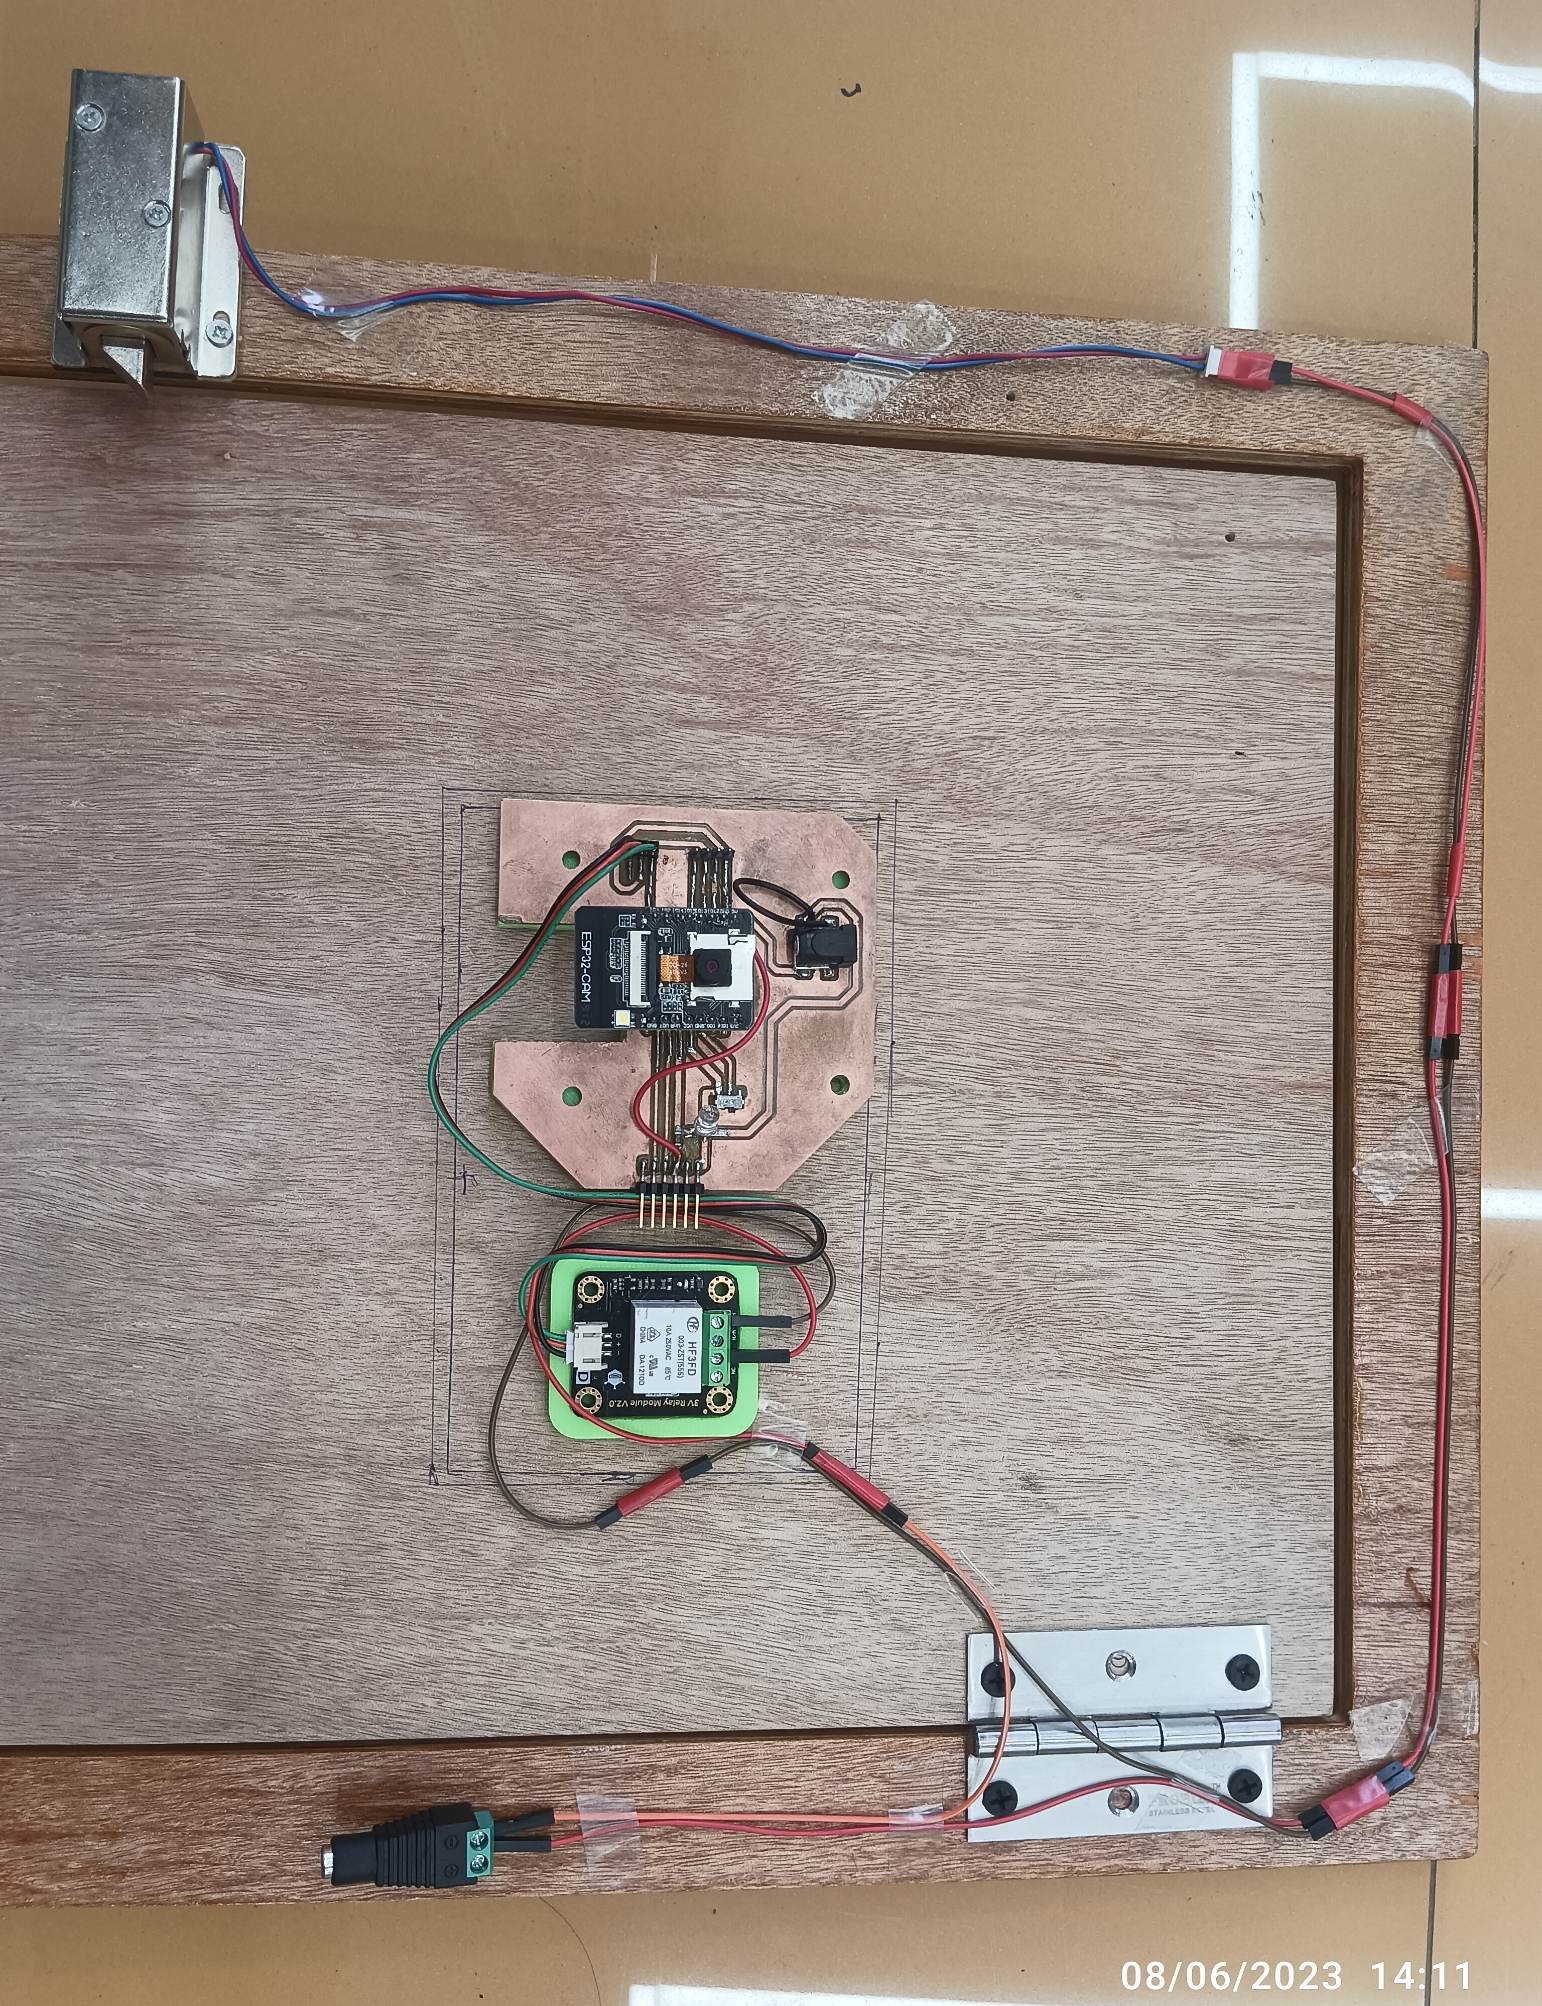
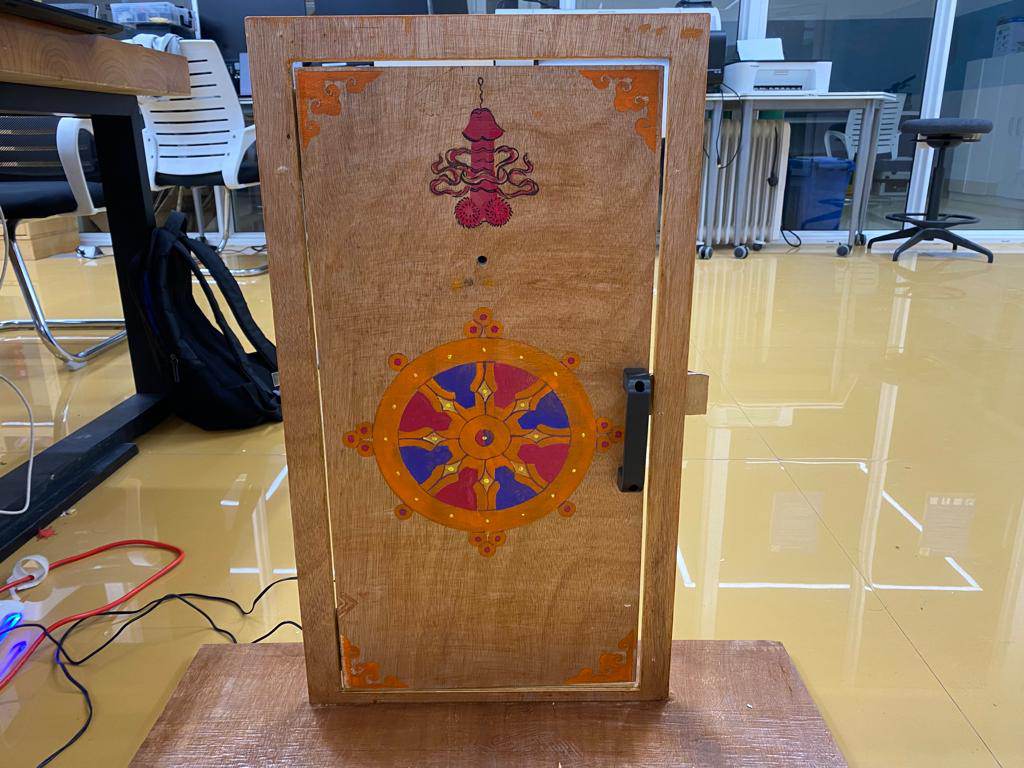
    Final Hero shot

    Design File

    ESP32-CAM Webserver Code

    ESP32-CAM with Solenoid Lock Code

    Final Code

    final Board Design File